There is now a “starter kit” available for your Office 365 SharePoint tenant (aka SharePoint Online or “SPO”).
It’s not just a site template but rather, it’s an entire solution featuring Modern page templates (not Classic), 17 custom web parts, 7 SharePoint framework extensions, and several other components – all customizable and ready-to-go. Plus, it’s open source.
It’s a work-in-progress so check back on the Github site occasionally for updates.
Link -> https://github.com/SharePoint/sp-starter-kit
I have a user who doesn’t want to make edits in the SharePoint list. He exports the list to Excel, makes his edits there, and then forces others to manually update the list with his edits. No more.
I tried using F12 and writing CSS code to do the trick but it wasn’t working. As usual, Google led me down many paths, most all of which were either over-the-top (write a solution in C# and deploy) or they just didn’t work. I finally found the one that worked and I confess, I wouldn’t have written the code like that. So I’m glad Wendy Li is smarter than I am.
Here’s the solution:
Edit the Page. Add a Script Viewer web part, then paste in the following code:
<style type="text/css">

a[id*='ExportToSpreadsheet']
{  display:none;}

</style>
The Audit Log in Office 365 is disabled, by default, presumably to save disk space.
To enable the audit log in your tenant, in the Office 365 Admin Portal browse to the Security & Compliance Admin Center -> Search & investigation -> Audit log search. Click Start recording user and admin activities then click Turn On.
Or you can use this PowerShell command:
Set-AdminAuditLogConfig -UnifiedAuditLogIngestionEnabled $true
Source: TechNet
Apr 17
8
When Edit Page is Not Available
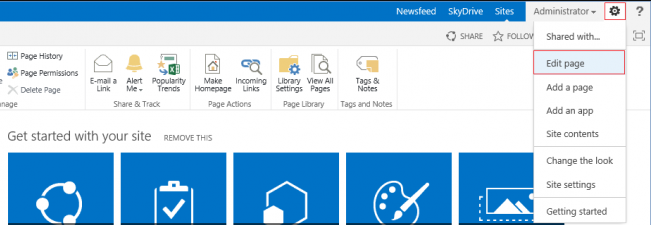
To edit a page in SharePoint 2013 that does not have Edit Page menu option available (pictured above), such as the Access Requests page, append the following bold text to the url (start with and include the ?):
http://SharePoint/sites/YourSite/Access%20Requests/pendingreq.aspx?ToolPaneView=2
For my little task, I actually used the following url:
I added the part about the pageview=personal because I was putting in some suspect CSS in a Script Editor web part and I didn’t want to bring down the house, so I was just working with my personal view of this page. However, you can go with pageview=shared or omit the pageview parameter altogether (and take your chances).
This brief article today simply expounds on a previous post I made in August, 2016 about this subject.
For you Office 365 subscribers, as of today, the Azure Active Directory version 2 PowerShell module can be downloaded from the below site which also contains a full list of the cmdlets available.
https://docs.microsoft.com/en-us/powershell/azuread/v2/azureactivedirectory
I encountered the following error today in our SharePoint 2013 environment while simply trying to move a web part to another web part zone:
A Web Part you attempted to change is either invalid or has been removed by another user
Of course, I went to Google first and found several articles on the subject, none of which fixed the problem. Then I found out from the SQL DBA that the SQL transaction logs had filled up the drive on the SQL Server. After the transaction logs were backed up and shrank, the error has gone away.
So add “check to see if you’re out of disk space on SQL” to the various remedies you pursue to resolve this issue. It worked for us.
<sarcasm>And thanks to Microsoft for such a helpful error message. </sarcasm>
Aug 16
2
Helpful SharePoint URL reference
I’ve often used the Web Parts Maintenance page in working with SharePoint sites. To get there, simply add ?Contents=1 to the end of the URL. My other favorite “quick link” is for opening a page in Edit Mode when I cannot otherwise. This is achieved by adding ?ToolPaneView=2 to the end of the URL.
Ahmed Farag has posted a very helpful blog article on MSDN back in 2013 with quite a few of these helpful URL add-ons. It’s still relevant today. We should probably all bookmark the page.
https://blogs.msdn.microsoft.com/how24/2013/05/23/famous-sharepoint-urls-locations/
In case you weren’t aware, Microsoft has provided a free, online PowerShell Command Builder utility:
I recommend that you bookmark it and refer to it whenever you need to double-check the commands in your scripts. You may want to download the Getting Started Guide.
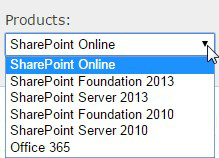
Make sure that the first thing you do is to select the appropriate version of SharePoint from the Products dropdown.
The rest is pretty straightforward.
Enjoy.
Now that you’ve created a brilliant chart, graph or dashboard in Tableau you want to render it on a SharePoint site. Here are the steps to do this. Honestly, the step you’re probably not thinking about is Step 1 below. If you’re working with the Tableau client on your desktop, you can make awesome interactive graphs but for everyone to see it, it needs to be published correctly to the Tableau server and make sure that the permissions are properly set.
Step 1: Publish your work to a Tableau publishing server.
Step 2: Open your browser and navigate to the Tableau server, find your work, and select it.
Step 3: Now click the Share link in the top right of your work, as highlighted below.
Step 4: A dropdown will reveal an Embed Code script and a Link. Highlight and copy the Embed Code script.
Step 5: Now open Notepad and paste in this code. Save it and give it a name. Make sure to keep the .txt extension and avoid using spaces. Use hyphens or underscores instead.
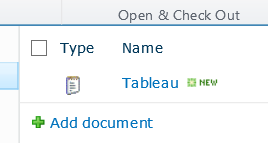
Step 6: Upload this text file to the SharePoint site where you want to render this graphic. I named my Tableau in the below screenshot.
Step 7: Select the file and open it in your browser. It should actually render and should look great.
Step 8: Now Select and Copy the entire url from the browser.
Step 9: Navigate to the page where you want the graphic to render.
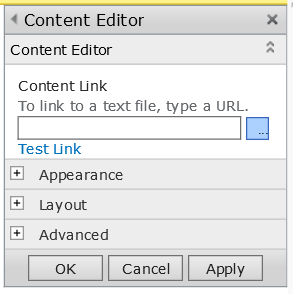
Step 10: Add a Content Editor Web Part where you want the graphic to appear and paste in the url for the Content Link section.
Step 11: Click OK on the Content Editor Web Part.
Step 12: Save and Close the page.
Success!
If you are using Tableau for reporting, you may want to connect to one or more lists in SharePoint. Here are the steps I take to do this.
Step 1: Open a browser and navigate to the SharePoint list you would like to work with in Tableau. Make a point to identify the list name.
Step 2: Now backspace over the url to just the site url and the trailing forward slash.
For example, if the list is at http://sharepoint/site/Lists/listname/allitems.aspx then backspace to http://sharepoint/site/
Step 3: Now add the following to the url: _vti_bin/ListData.svc
The url should now read: http://sharepoint/site/_vti_bin/ListData.svc
Step 4: Press Enter. Select and copy this url to the clipboard.
Step 5: In the resulting XML file, find the list name of your list. It may be slightly different than the list name on the actual list but it will be close. For example, a list called Monitoring Activity may render in the XML file as MonitoringActivity.
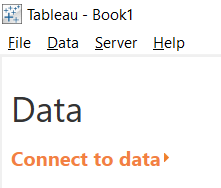
Step 6: Open Tableau Desktop and select Connect to Data
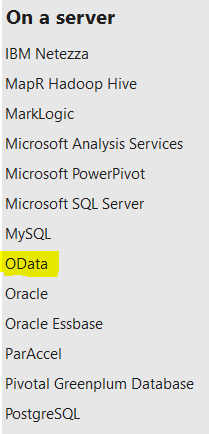
Step 7: On the Connect to Data page, select OData
Now we’re going to put it all together.
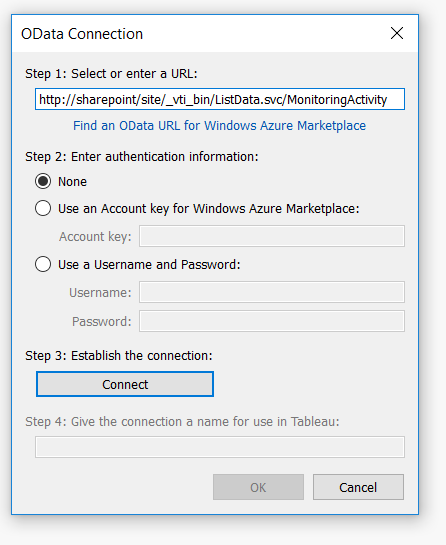
Step 8: In the OData Connection dialog box, paste in the url from the clipboard, then add a forward slash, then copy and paste in the List name from the XML file.
Quick explanation: We’re using the SharePoint REST service here and it is case-sensitive. Hence, be very exact with the list name.
For example: http://sharepoint/site/_vti_bin/ListData.svc/MonitoringActivity
Step 9: Keep the default Authentication set to None and click the Connect button. It will assign you a connection name. Feel free to change it.
Step 10: Click the OK button
Success!

