A chronicle of issues encountered in SharePoint

Author: Doug Page 5 of 8

List View Web Part Paging Issue

One of my users has a SharePoint site with a list called Admin Tips, currently with 45 tips (list items).  She has a List View Web Part (LVWP) on the main site page to render this list, choosing a particular view to render for the web part.  The specific View she has chosen has the Item Limit set to 1.

View-Item-Limit

The result is that the tips show one at a time in this View.  Therefore, the LVWP on the main page which calls this view renders the tips one at a time.  Each tip has a “pagination” link at the bottom which is a fancy term for paging, both of which mean: you can go from one page (or tip) to another.  Most of the time you see this on the web as Back and Next buttons (or links).

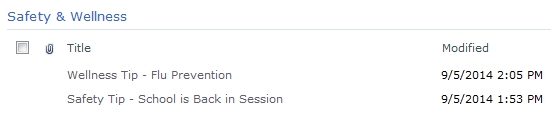
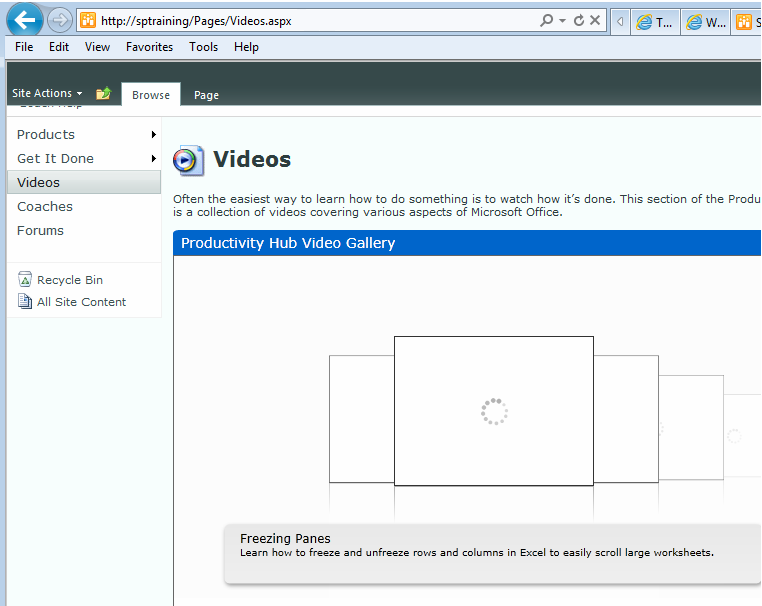
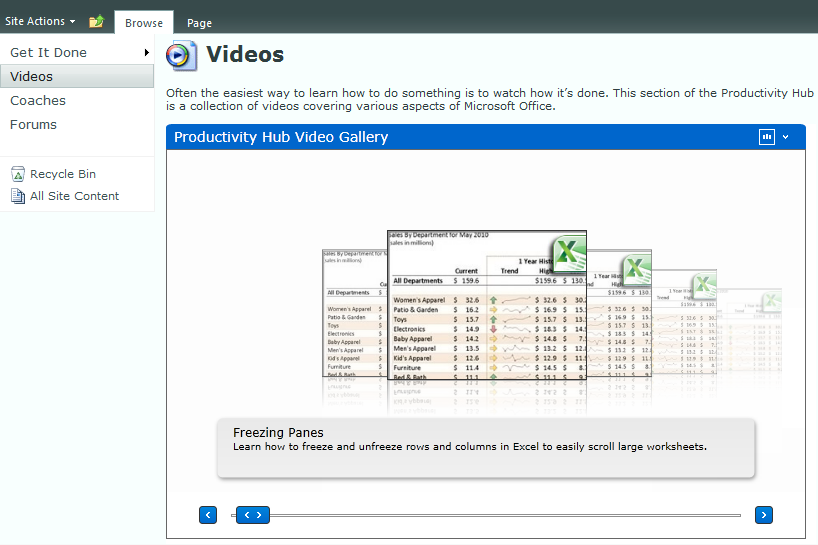
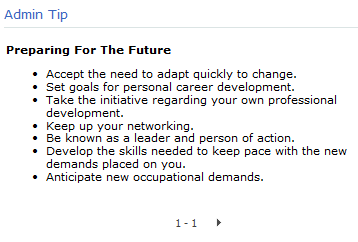
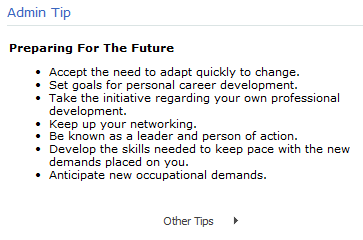
Here’s how this specific LVWP renders on the main page:

LVWP-Main-Page

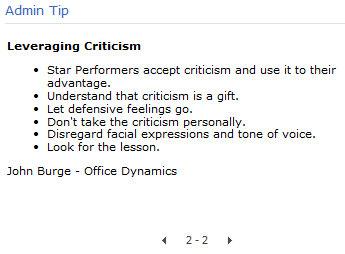
I clicked the arrow (above) which took me to Tip 2:
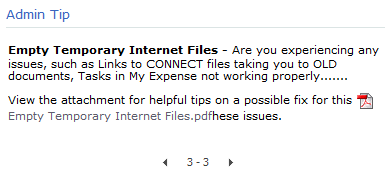
LVWP-Main-Page-2

And here is Tip 3:

LVWP-Main-Page-3

Notice how each tip shows arrows for going backward and forward to other tips.

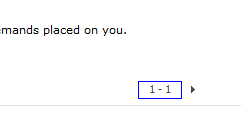
Unfortunately, the numbers in between are wrong.  Knowing that there are 45 items in the list, the three tips should show “1 of 45”, “2 of 45”, and “3 of 45”.  Or simply 1, 2, and 3.  But definitely not 1-1, 2-2, and 3-3.  Why the hyphen and then a repeat of the tip number?  It doesn’t make sense.  So far, the only help I’ve been able to find on the Internet is to edit the XSLT and hope for the best.  Personally, I’m not interested in going that route.

My Solution

The important thing to note here is that the pagination issue is on the View.  The List View Web Part on the main page is simply rendering the View specified in the web part, so let’s focus on the View itself.  Go to the list and select the View that is being rendered in the web part.  Most likely, it will be All Items but if you’ve created another View and chosen it for the LVWP, then go to that View.  Notice that you’re on a specific .asp page rendered as <viewname>.aspx.

I figured I could solve this problem using CSS and I wanted a simple solution.  Seeing that I have the Back and Next arrows, I don’t really care if the user knows which precise tip they’re on.

I opened my browser in IE, navigated to the list, selected the View, and then launched IE Developer Tools by selecting the F12 button.  In the Developer Tools pane at the bottom I selected Find >> Select element by click.

I selected the section where the paging occurs:

Select-Element

Developer Tools tells me the code behind this element, including the exact CSS class:

DevTools-element

So I wrote a little script that will change this td.ms-paging element:


<style>
 td.ms-paging { 
	text-indent: -9999px;
	line-height:0;
}
 td.ms-paging:before { 
	text-indent:0;
	content:'Other Tips';
	display:block;
	line-height: initial;
}
</style>


I wish I could take full credit for this solution but I cannot.  I just put it all together.  I tried Option 1 from The WP Guru on this page but it did not work for me.  However, Option 2 worked like a charm.

I simply saved the above code to a .txt file and uploaded it to the Site Assets folder, then opened it and copied the url.

Next, I went to the main site page, added a Content Editor Web Part (CEWP) above the Admin Tip section (so the browser will process my CSS code first), and pasted in the link to the .txt file.

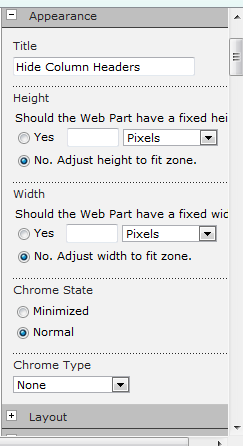
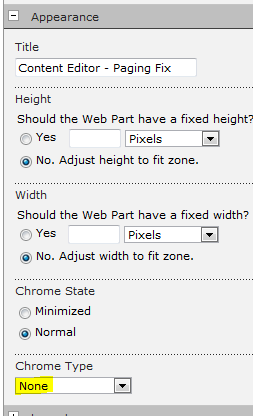
As a housekeeping tip, under Appearance, change the Chrome Type to None.  See below.

Chrome-Type

It works perfectly as far as I’m concerned.  I simply replaced the bad paging nonsense with the term “Other Tips” as you can see:

LVWP-Fixed

Clicking the arrow took me to Tip 2:

LVWP-Fixed-2


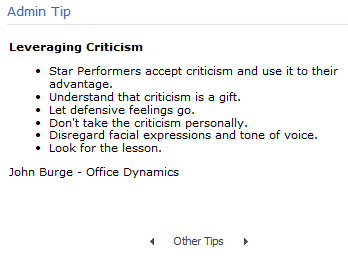
Now my users can navigate back and forth to other tips without being annoyed at the wacky pagination numbers that SharePoint renders.

Last, it’s up to you if you want to add this solution to the specific View on the list as well.  If you do, simply navigate to the list, select the specific View with the paging feature, add a CEWP at the top of the page, and paste in the link to your text file.  Don’t forget to change Chrome Type to None and you’ll be all set.

Migrate a list to another site collection or web app

One of my users came to me today frustrated that he cannot find any information from Google about migrating a list from our Test environment to our Prod environment.  He says that most of the content is for 3rd party products.  He certainly doesn’t want to move it by hand.  Good news: the solution is easy.

This will work across site collections and even web applications. As you probably know, when you save a list as a template, it saves it to the Site Collection List Template Gallery, which means it’s only available to be deployed elsewhere in the Site Collection. The following steps will allow you to migrate a list to another site collection, or even another web application.


Summary of Steps

  1. Save the list as a template
  2. Go to the list template gallery and download it locally
  3. Navigate to the site collection list template gallery where you want the list to be
  4. Upload it to the gallery
  5. Deploy it to your desired site


Detailed Steps

1.  Save the list as a template

In your list, go to the List tab and select List Settings

List-Settings

Save the list as a template.

Save-list-as-template

2. Go to the list template gallery and download it locally

Click Site Actions, Site Settings

Site-Settings

Go to Top Level Site Settings (which is for the Site Collection)

Top-Level-Site-Settings

Under Galleries, Select List Templates

List-templates

Browse to the list template you just created and select the checkbox to the left of the name

Select-list-template

Select Download a Copy from the ribbon and save to your local machine

Download-list-template

3. Navigate to the site collection list template gallery where you want the list to be

Now, navigate to the site where you want the list to ultimately reside.

As before, go to Site Actions >> Site Settings >> Site Collection Administration: Go to top level site settings

Top-Level-Site-Settings

As before, go to Galleries: List Templates

List-templates


4. Upload it to the gallery

On the ribbon, select the Documents tab.

Now select the Upload Document button.

Upload-Document

The list template is now in the site collection gallery and will thus be available to you for deployment to your site.


5. Deploy it to your desired site

Navigate to the site where you would like the list.  Click Site Actions >> More Options

More-Options

I like to filter the Create page to just the lists.  Do this by clicking List under Filter By:

Filter-By

Select your list and deploy.  And you didn’t need a 3rd party tool at all.

Change the URL for a List or Library in SharePoint

Create-New-Site

Provides for both a Site title as well as URL

Create-New-Site-with-Data

I prefer to use full words for the title and abbreviations for the URL.


In SharePoint 2010, when you create a new site, you provide both the Site Name and the Site URL.  If at any point you want to change either, it’s simple.  Just go to Site Actions >> Site Settings >> Look and Feel [section] >> Title, description, and icon.

Site-Title-Description-icon

However, when you create a new List or Document Library, you provide the name but you do not have anywhere to specify the URL.  The URL is generated by SharePoint from the name you provide.  Often, this has undesirable results.

  • The worst offender is spaces. Each space is converted to %20 in the URL string.
  • Dashes in the name are omitted in the url, so if you used them for splitting words, you’re out of luck.
  • Long list or document library names may be fine for displaying on the menu but they make for cumbersome, often needlessly long URLs.
  • If you’re several sub-sites deep, your spaces have been converted to %20, and you have long list or library names, coupled with long filenames, you run the risk of exceeding the 256 character limit.


The Solution That Doesn’t Work
If you attempt to rename the list or document library, it doesn’t change the URL at all.  You’re stuck with the original URL.  All you get is a changed Display Name.  Even when you use re-name in SharePoint Designer 2010 it doesn’t change the URL – just the Display Name (Title).

I mostly found quite unhelpful suggestions when I Googled this issue.


The Solution That Does Work
I finally found a solution that worked for me and it’s remarkably old-school.  One of the many sites posting the unhelpful re-name strategy had a gem hidden in it from a user named Todor Kisov.

His response was not marked as a solution but it worked for me, unlike the answer that was marked as a solution.  Go figure.

In a nutshell, here is what worked:

  1. Inside the Document Libary, select the Library tab
  2. Select Open with Explorer  
  3. Now in Windows Explorer, navigate up once to the site level
  4. You will now see a listing of the site contents, including the various document libraries as well as a folder called Lists
  5. Find the document library or list you wish to rename
  6. Right-click on it, and simply select Rename from the menu


Problem solved!

SharePoint Constantly Prompts for Credentials

Some of our users are prompted for their username and password every time they visit sites in SharePoint.  It’s especially annoying if they’re logged in and attempt to navigate to another site, where they are prompted again and again.  The question has come up: “Why can’t SharePoint remember my username and password from one minute to the next?!?”

The answer is: it’s not SharePoint.  The culprit may be your browser settings and if so, the solution is two simple settings changes.  But first, an explanation.

If you’re using Windows authentication then this should be simple.  Your users have already “authenticated” into Windows when they logged into their machines.  If these same credentials are used for SharePoint, we simply need to tell your browser to pass along these credentials to SharePoint.  Otherwise, your browser will prompt for them each time.  Sound familiar?

I’m going to provide the settings for Internet Explorer in this article.  This solution should work for Chrome and Firefox as well since the Internet Settings apply to all three.  I’ll provide a general description of the solution here below.  Detailed instructions will follow these general instructions at the end (via a link).

Step 1
I recommend listing your SharePoint top-level domain in the Local Intranet zone in IE.  Some folks like to put their SharePoint domain in Trusted Sites and that will work too.  I’ve heard arguments on both sides so pick your poison.  But at least pick one of them.  Like I said, I recommend the Local Intranet zone.

Step 2
Once you’ve added your SharePoint top-level domain to the Local Intranet zone, update the zone Security Settings to automatically pass the user’s Windows credentials on to sites in this zone.

Microsoft has really pulled a fast one here.  The zone-specific Security Settings are accessed by clicking a button mislabeled as “Custom level…” for some reason.  See screenshot below.  The window that comes up, however, is correctly labeled Security Settings and specifies the zone selected.

Internet-Options-Custom-Level

Detailed instructions for this process are available as Steps 4 and 5 on this article previously published here on this site.

I hope this helps your users break free from the prompts!

Access Denied for users with proper permissions

If you have encountered an Access Denied message in SharePoint although you have proper permissions to the site, page, list, or library, then it could be one of several reasons. Hopefully one of these several fixes will work for you.

Access Denied

Fix #1:

For the site or sub-site with the Publishing feature enabled, ensure all users have read access to the master page library.
Site Actions > Site Settings > Master pages and page layouts > Library tab > Library Permissions > Grant Permissions button. Add Authenticated Users with Read permission level as in the screenshot below.

Add-All-Authenticated-Users-to-SharePoint

Fix #2:

If you experience Access Denied on file upload or download, it may be your anti-virus settings.

The following folders may have to be excluded from antivirus scanning when you use file-level antivirus software in SharePoint. If these folders are not excluded, you may see unexpected behavior. For example, you may receive “access denied” error messages when files are uploaded.

  • Drive:\Program Files\Microsoft Office Servers\14.0\Data
    (This folder is used for the indexing process. If the Index files are configured to be located in a different folder, you also have to exclude that location.)
  • Drive:\Program Files\Microsoft Office Servers\14.0\Logs
  • Drive:\Program Files\Microsoft Office Servers\14.0\Bin
  • Drive:\Program Files\Microsoft Office Servers\14.0\Synchronization Service

Reference Links:

http://support.microsoft.com/kb/952167

http://www.symantec.com/business/support/index?page=content&id=TECH141492

http://blogs.msdn.com/b/chaun/archive/2013/08/01/do-we-really-need-to-set-antivirus-exclusions-up-for-our-sharepoint-servers.aspx

Thanks to Ripon Kundu for contributing to this section.

Fix #3:

You may also experience an Access Denied while uploading a file to a site that utilizes the Content Organizer feature  *and*  the site’s Drop Off Library has unique permissions.

The resolution is to make sure that users have Contribute access to a site’s Drop Off Library” per this article.

This solution, you may notice, bears a strong resemblance to Fix #1.  The takeaway here is to really mind your permissions.

Hide Column Headers in Webparts

A user posted a List View Web Part on their intranet site alongside their Announcements (also a List View Web Part).  For a cleaner look, I was asked if we could get rid of the column headers for all of the web parts on the page.  They aren’t really useful, they state the obvious, and they take up valuable real estate on the site.  So let’s get rid of them.

Hide Column Headers

Before – Notice the Column Headers ‘Title’ and ‘Modified’

*** Click the images to view them full-size ***

Hide Column Headers

After – Notice the Headers are now gone


It took a little while via Google to find the solution which was:
A.) not selected as an answer, and
B.) all the way at the bottom.

So I’ll make it quick and easy for you.

  1. Open Notepad
  2. Paste in the following code:
    <style>
    .ms-viewheadertr { display: none;}
    </style>
    
  3. Save it as Hide-Column-Headers.txt
  4. Upload the file to a doclib on your site or in your site collection
  5. Copy the path to the file and the filename, i.e. /sitecollection/site/doclib/Hide-Column-Headers.txt
  6. Go to the page where you want to hide the web part headers and create a new Content Editor Web Part (CEWP)
  7. Paste in the link to the file including the path
  8. In the Appearance tab I changed the Title to “Hide Column Headers” and changed the Chrome type to “None”.  Otherwise it will show on the page and confuse the users.
    CEWP Settings
  9. Click Ok in the Content Editor Web Part (CEWP)
  10. Save and Stop Editing the page

Success!  Now all of the List View web parts on the page will render without the unnecessary column headers.

The file {filename} is locked for shared use by {user}

the-file-is-locked-for-shared-use

SharePoint-the-file-is-locked-for-shared-use

If you have seen either of the above messages while trying to open a document in SharePoint, you are probably as confused as we were.  My user was getting this even though the file was not checked out.  Worse still, the message said that the file was locked out… by him.  He didn’t have it open and there were no “orphaned” processes of Winword.exe running in Task Manager.  So how could this be?

When I Googled this error, I came upon a ridiculously weak thread on TechNet that basically says it’s designed that way and that you have to wait for 10 minutes for the lock to clear.  Nonsense!

Resolution

The culprit in our case was Credential Manager, which may be accessed via Control Panel.  Simply select the entry for the web application URL in Credential Manager and delete it by selecting “remove from vault“.

For step-by-step instructions on how to do this (including screenshots), follow the post Step 2: Clear Your Cache in Credential Manager from a few months back.

Productivity Hub Silverlight Slider Preview Images Do Not Display

First, an introduction to the Productivity Hub for SharePoint 2010:

Microsoft has developed the Productivity Hub to help support your ongoing end user training efforts.

The Hub is a SharePoint Server site collection that serves as a learning community and is fully customizable. It provides a central place for your training efforts, and includes training content from Microsoft’s core products.


The Problem

On the main page there is a nifty Slider Silverlight Web Part that allows users to scroll through preview thumbnails of the various videos available.  It’s very cool.  There’s also a slider on the Videos page.  We had the problem recently where the slider on the Videos page was not rendering the preview thumbnails, as seen in the screenshot below.

Productivity Hub Slider Silverlight Web Part

Clicking the failing-to-load image did correctly launch the appropriate video so that functionality was fine – it was simply that the thumbnails were not showing.  They are located in Site Assets / Video Thumbnails folder.

You can find the files listed below.  They are named in such a way that it is easy to identify which file is used as a thumbnail for which video.

Video Thumb-Excel.jpg
Video Thumb-InfoPath.jpg
Video Thumb-OneNote.jpg
Video Thumb-Outlook.jpg
Video Thumb-PowerPoint.jpg
Video Thumb-Word.jpg

For these files to not show there are two possible scenarios:
those files are either missing -or- they are corrupt.

In our case they were corrupt. We came to this conclusion because we were not able to download these image files. ( It was throwing a download error stating that the file was corrupt).

The Solution

How these files became corrupt is a mystery.  As you might be aware SharePoint does not give the user the privilege to edit image files directly, so we’ll just have to replace them.

First, we have to go get the image files.  Open the following site in your browser http://www.spsdemo.com/sites/productivity/. Get the images from here.

Then, simply upload and overwrite the corrupt images -or- delete the old corrupt images from the library and then replace them with the good ones.

Either way: problem solved.

Productivity-Hub-Video-Previews

SharePoint Prompts for Credentials Three Times Followed by a Blank White Page

Several of my users have encountered the problem of three failed login attempts to SharePoint resulting in a blank white screen.  This can happen when a user’s  login credentials (username and password) are incorrect.  Unfortunately, this can also happen when they put in their correct information.  This second scenario can be bedeviling so I’ll go over the various tasks you can perform to resolve this problem:

1.  Clear your browser cache and restart your browser
2.  Clear your cache in Credential Manager
3.  Alternate way to clear your cached credentials
4.  Add site to Trusted Sites
5.  Pass along current credentials to IE

**Please also note the addendum regarding prompts for a mapped drive to a SharePoint site.


1.  Clear Your Browser Cache and Restart Your Browser

Perhaps the easiest and most well known, you’ve probably already tried this step.  If you have not, Google the steps and perform them, then restart IE.

2.  Clear Your Cache in Credential Manager

  1. Close any open browser windows
  2. Open Control Panel.
  3. On the upper right side of Control Panel, change the View by: dropdown selection from Category (shown below) to either Large Icons or Small Icons.  Pick either one.
    Category-Control Panel
  4. In Control Panel, open Credential Manager.
    Credential_Manager
  5. In Credential Manager, select the URL that is not authenticating properly.  It will expand the entry.
  6.  Select Remove from vault
    remove-from-vault
  7.  Select Yes to the warning message that follows
  8. Close Credential Manager
  9. Open your browser and try to connect again

Alternatively, if you have WinXP you will not have Credential Manager – you will have Stored Usernames and Passwords instead.  This site will guide you on how to clear this system cache in WinXP.


3. Alternate Way to Clear Your Cached Credentials

  1. Close any open browser windows
  2. On the Run line, type (or copy and paste) the following:
    rundll32.exe keymgr.dll, KRShowKeyMgr

    Stored-user-names-and-passwords

  3. Click OK
  4. Select the credential you need to clear and then click the Remove button
  5. Click the Close button
  6. Open your browser and try to connect again

Source: Windows IT Pro website


4.  Add Site to Security Zone

Internet Explorer lets you categorize websites into different zones with different security policies for each zone. Be default, sites are all categorized as Internet.   We will look at two different types of site: Intranet and Trusted Site.

Intranet sites

If you are on a company Intranet site you should add the url to your list of sites in your Intranet zone.

  1. In Internet Explorer, open Internet Options
  2. Select the Security tab
  3. Select the Local Intranet icon
  4. Click the Sites button
    Local Intranet
  5. If the site does not use the https protocol, then un-check the checkbox for:
    Require server verification (https:) for all sites in this zone.
    require-server-verification
  6. Paste or type in the url of the site into the input box, then select the Add button
  7. Click Close
  8. Click Ok
  9. Close your browser
  10. Open your browser and try to connect again


Trusted Sites

If you are experiencing trouble authenticating to an Internet site that you regularly visit (and that you trust) you should add it to your Trusted Sites zone.


  1. In Internet Explorer, open Internet Options
  2. Select the Security tab
  3. Select the Trusted Sites icon
  4. Click the Sites button (as shown below)
    Internet Options
  5. If the site does not use the https protocol, then un-check the checkbox for:
    Require server verification (https:) for all sites in this zone.
    require-server-verification
  6. Paste or type in the url of the site into the input box, then select the Add button
  7. Click Close
  8. Click Ok
  9. Close your browser
  10. Open your browser and try to connect again


5.  Pass Along Current Credentials to IE

  1. In Internet Explorer, open Internet Options
  2. Select the Security tab
  3. Select the Custom Level button at the bottom
    Custom-level
  4. Scroll all the way to the bottom of this window
  5. In the User Authentication section, select:
    Automatic logon with current user name and password
    automatic-logon
  6. Click OK
  7. Click OK
  8. Close your browser
  9. Open your browser and try to connect again


**Addendum Regarding Mapped Drive to a SharePoint Site

You’ll want to configure Internet Explorer for automatic logon with current user name and password as above.  However, you’ll also need to edit your registry to tell Windows to allow the webclient service to remember passwords.

  1. Open Registry Editor (RegEdit)
  2. Navigate to this registry key: HKEY_LOCAL_MACHINE\SYSTEM\CurrentControlSet\Services\WebClient\Parameters
  3. Click Edit > New > Multi-String Value and enter the name:
    AuthForwardServerList
  4. For the Value enter the URL of the sharepoint site
  5. Close RegEdit
  6. In Services, restart the WebClient service.

Source:  http://tipsyouforgot.blogspot.com/2010/06/remember-password-setting-not-working.html


Redirect a SharePoint site

Recently, we needed to redirect users from a site in SharePoint to another site.  First, we set the old site to Read-Only. How? Navigate to {Central Administration Site |Application Management | Configure Quotas and Locks} and select one of the options under “Site Lock Information“.

We then copied all of the content, and sent out a message to the users affected about the new site location.  For those who did not get the e-mail, we wanted to redirect traffic to the new site along with an explanatory message.  We went with “the simple way” below but if you feel like showing off, go with the second option.

1. The Simple Way

This tutorial by Devin Walker fits the bill.  It uses the JavaScript Alert box which provides for a message and an OK button.  We chose to use a Confirm box instead in order to allow a choice for users to either stay on the Read-Only site or go to the new site.

Here is the code we used:

<script type=”text/javascript”>// <![CDATA[
 var cnf=confirm("XYZ site has been migrated, and this site is now Read-only. \n\nClick Ok to navigate to the new, migrated site or Cancel to remain on this Read-only site.");
 if(cnf)
 {
 location.href="http://sharepointserver/sites/XYZ/";
 }
 // ]]></script>

To Implement
Use a Content Editor Web Part (CEWP) and paste in the above code, modified with your message and your new site url in the location.href statement.  That’s it.

2. A Better Way

The above provides a simple, old school (some would say “archaic”) redirect script and message.  If you’re like me, sometimes you like to be fancy and modern.  In this case, implement this nifty script instead to alert users and redirect them to the appropriate sites.

To Implement
Download the zip file from the website, unzip the files, and upload them to your Site Assets document library (or a folder there created for this purpose).

Then, install a Content Editor Web Part (CEWP) on the target page and proceed as above, edited for your environment and the path to your Site Assets document library.

Page 5 of 8

Powered by WordPress & Theme by Anders Norén