A chronicle of issues encountered in SharePoint

Category: SharePoint 2010 Page 3 of 5

Microsoft SharePoint 2010

Productivity Hub Silverlight Slider Preview Images Do Not Display

First, an introduction to the Productivity Hub for SharePoint 2010:

Microsoft has developed the Productivity Hub to help support your ongoing end user training efforts.

The Hub is a SharePoint Server site collection that serves as a learning community and is fully customizable. It provides a central place for your training efforts, and includes training content from Microsoft’s core products.


The Problem

On the main page there is a nifty Slider Silverlight Web Part that allows users to scroll through preview thumbnails of the various videos available.  It’s very cool.  There’s also a slider on the Videos page.  We had the problem recently where the slider on the Videos page was not rendering the preview thumbnails, as seen in the screenshot below.

Productivity Hub Slider Silverlight Web Part

Clicking the failing-to-load image did correctly launch the appropriate video so that functionality was fine – it was simply that the thumbnails were not showing.  They are located in Site Assets / Video Thumbnails folder.

You can find the files listed below.  They are named in such a way that it is easy to identify which file is used as a thumbnail for which video.

Video Thumb-Excel.jpg
Video Thumb-InfoPath.jpg
Video Thumb-OneNote.jpg
Video Thumb-Outlook.jpg
Video Thumb-PowerPoint.jpg
Video Thumb-Word.jpg

For these files to not show there are two possible scenarios:
those files are either missing -or- they are corrupt.

In our case they were corrupt. We came to this conclusion because we were not able to download these image files. ( It was throwing a download error stating that the file was corrupt).

The Solution

How these files became corrupt is a mystery.  As you might be aware SharePoint does not give the user the privilege to edit image files directly, so we’ll just have to replace them.

First, we have to go get the image files.  Open the following site in your browser http://www.spsdemo.com/sites/productivity/. Get the images from here.

Then, simply upload and overwrite the corrupt images -or- delete the old corrupt images from the library and then replace them with the good ones.

Either way: problem solved.

Productivity-Hub-Video-Previews

Assign Default Values to your People Picker Control in SharePoint 2010

What would it be like if you had power in your hands but still were not able to use it… Yes it happens almost every day in the lives of us SharePoint People. Today we are going to talk about one such situation: the people picker control. You cannot set a default value for the people picker control from the SharePoint UI… wonder why?  With a little help from JQuery, we can.

Add New Itenm People picker control

Add New Item People picker control empty

So we are going to make this happen. Lets Start. Create a custom list and add  new columns of your choice. One of them should be a people picker control. Here I have given the title of the people picker control to be “Assigned To“. Now there are two ways to implement this functionality. Either open the Newform.aspx in SharePoint Designer, (not a very recommended approach but if you want a quicky, then do this by writing JavaScript and JQuery anywhere below the Content PlaceHolderMain) else open the Newform.aspx page in the browser and insert a content editor web part. Now create a text file and write the JavaScript and JQuery inside this text file, save it as .txt file and upload this to some location in the SharePoint site where you want this functionality to be implemented.

In the content link property of the content editor web part, provide the URL of the location of  the text file that we previously created. Please find the code below for this file.    These three files need to be loaded onto the server where this code is getting called.  ( Please download them from the internet.)

  • jquery.SPServices-0.7.2.js
  • jquery.SPServices-0.7.2.min.js
  • jquery-1.10.2.min.js

Please find the code below written in JQuery/Javascript. This is the code that needs to be placed for achieving the functionality:

<
<script src="http://yourserver/sites/ListBreak/SiteAssets/jquery-1.10.2.min.js"></script>
<script src="http://yourserver/sites/ListBreak/SiteAssets/jquery.SPServices-0.7.2.min.js"></script>
<script src="http://yourserver/sites/ListBreak/SiteAssets/jquery.SPServices-0.7.2.js"></script>
<script type="text/javascript">
 $(document).ready(function(){
//Get the current user
 var user= $().SPServices.SPGetCurrentUser();
// This is for getting current user
 var defaultuser = "Guru ,Venkataraman";
// this is for assigning any default user to the control
//Set all sharepoint 2010 people picker default to current user
 $("div[title='People Picker']").text(defaultuser);
 });
</script>;

Once this is added in the appropriate place with the supportive .js files, you should see the below screen for the newform.aspx on your list with the people picker control populated with a default username.

People picker Assigned to default user set

People picker Assigned to default user set

HAPPY CODING!!! 🙂

Guru

“Email A Link” Ribbon button for a List!!!

Today we are going to talk about a piece of functionality that would make you feel….Oh i have to have it!.  I am talking about the “Email a Link” functionality for an individual list item.

You may think this is already available so what’s the commotion all about? Yes!!  This functionality is available in SharePoint document libraries but not for lists. Furthermore, you cannot add this OOTB or as a feature or add-on.  It’s just not available.  No idea why Microsoft did such a thing.  The fundamental principal behind the solution presented here is to exploit the OOTB control that is provided for libraries to a custom list using a little tweak.

This custom Email a Link functionality is implemented for custom lists to have the ability to send a link of that item in an Email client. The use of the ribbon, the power of the JavaScript call to window.open, and the mailto parameters makes the magic come together.

Still confusing?  Let’s dive in to the well to find out more.

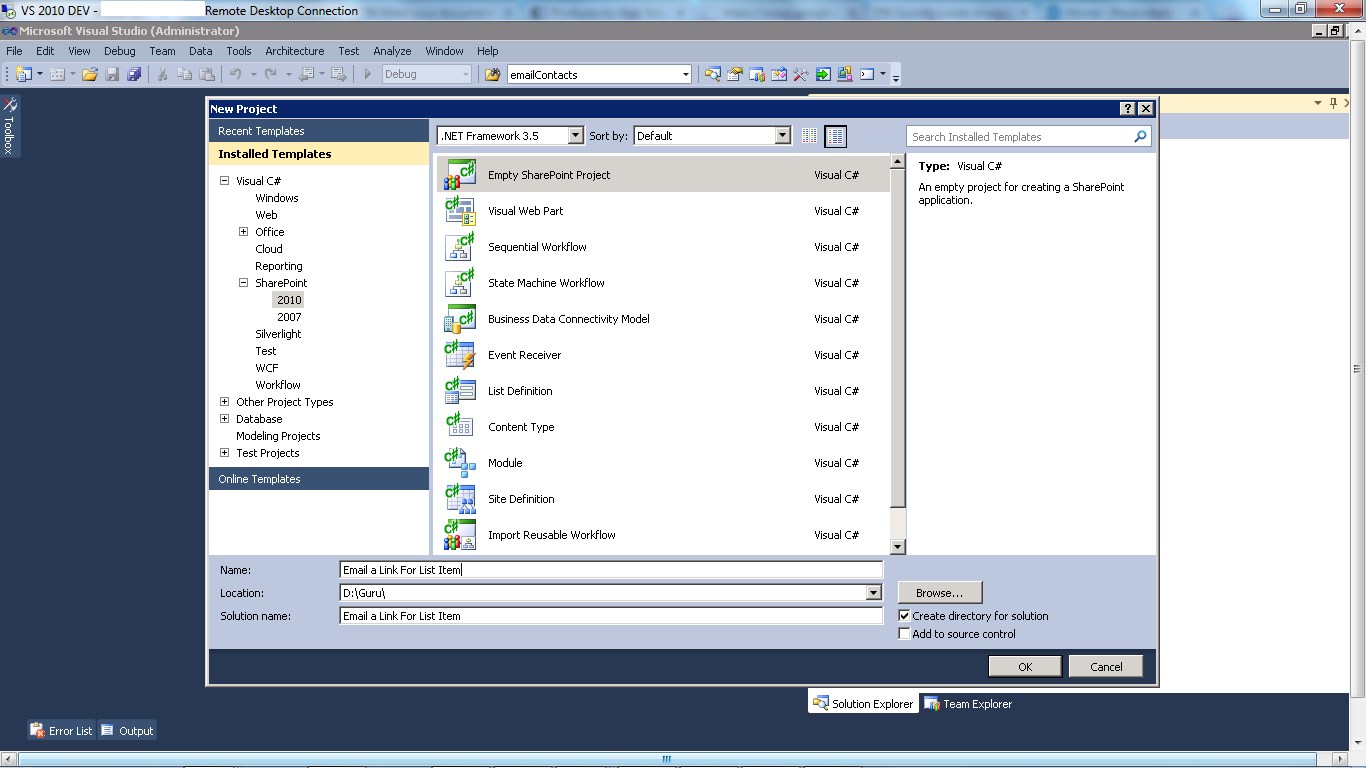
So let’s start getting our hands dirty by starting with our Visual Studio Custom Ribbon Project. Select your Visual Studio tool to be run as Administrator. Select New project from File menu. You will land in the screen as shown below.

VS Step 1 empty Project

Select an empty SharePoint project.  Currently I use C# as my preferred language of instruction.

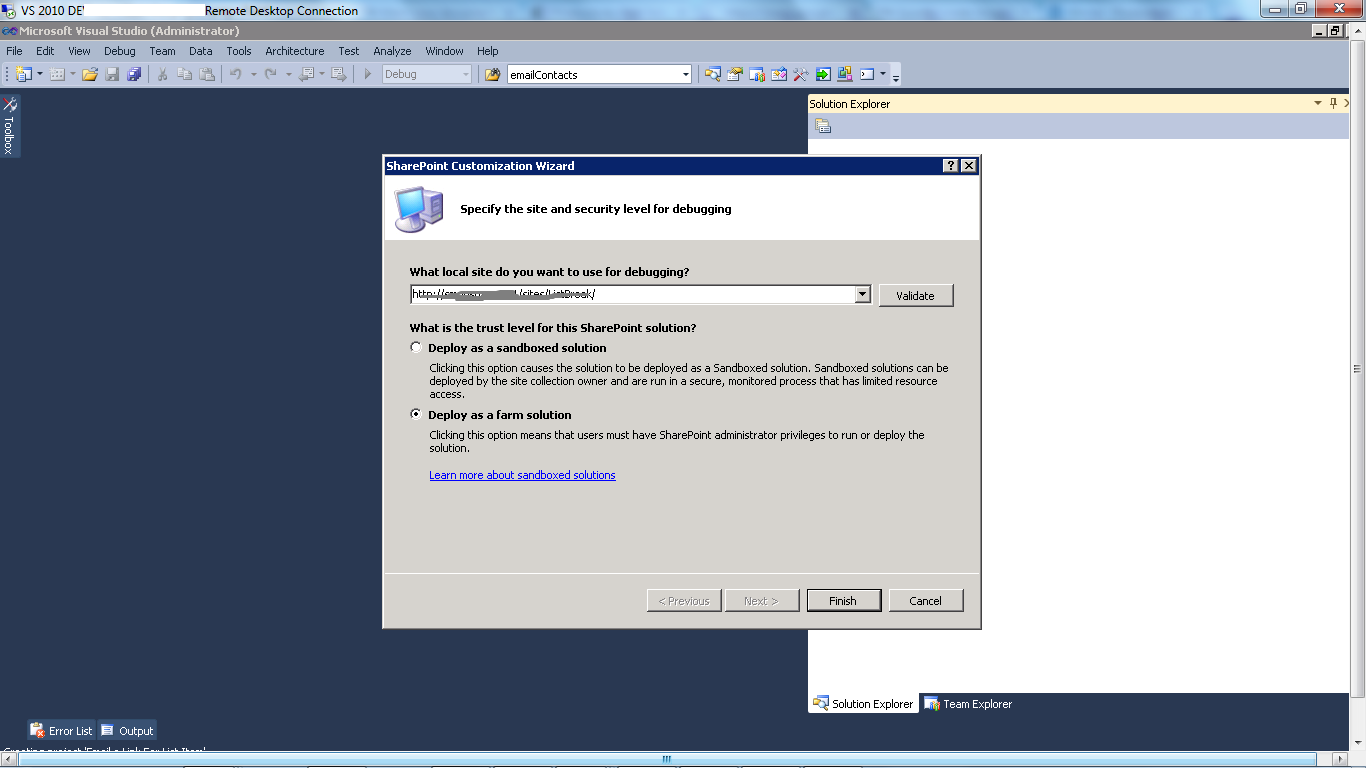
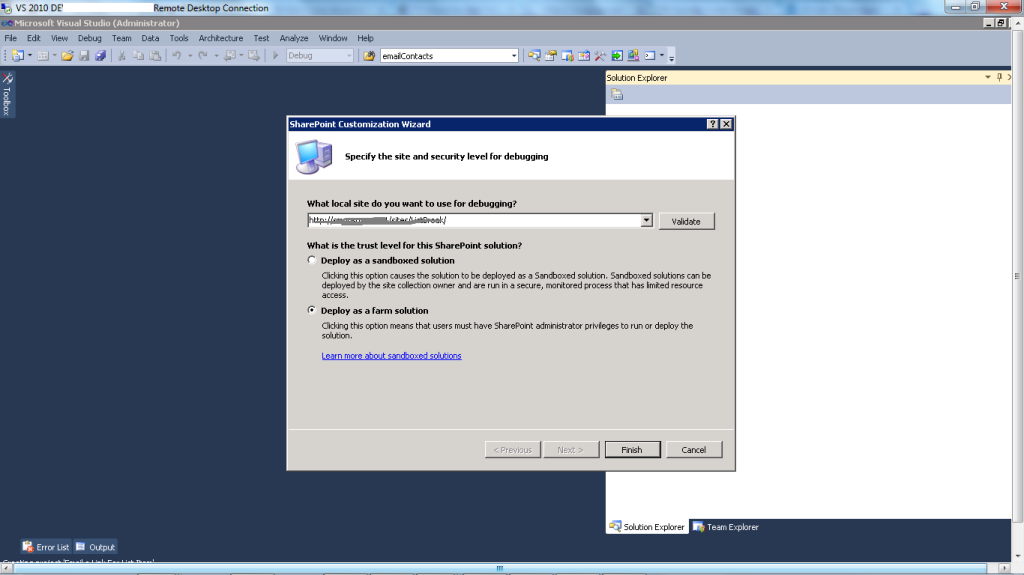
When you click on the OK button, VS takes you to the config screen as shown below where you select this solution to be a farm solution. We are doing this because this can be globally reused at any site collection.

VS Step 2 farm solution

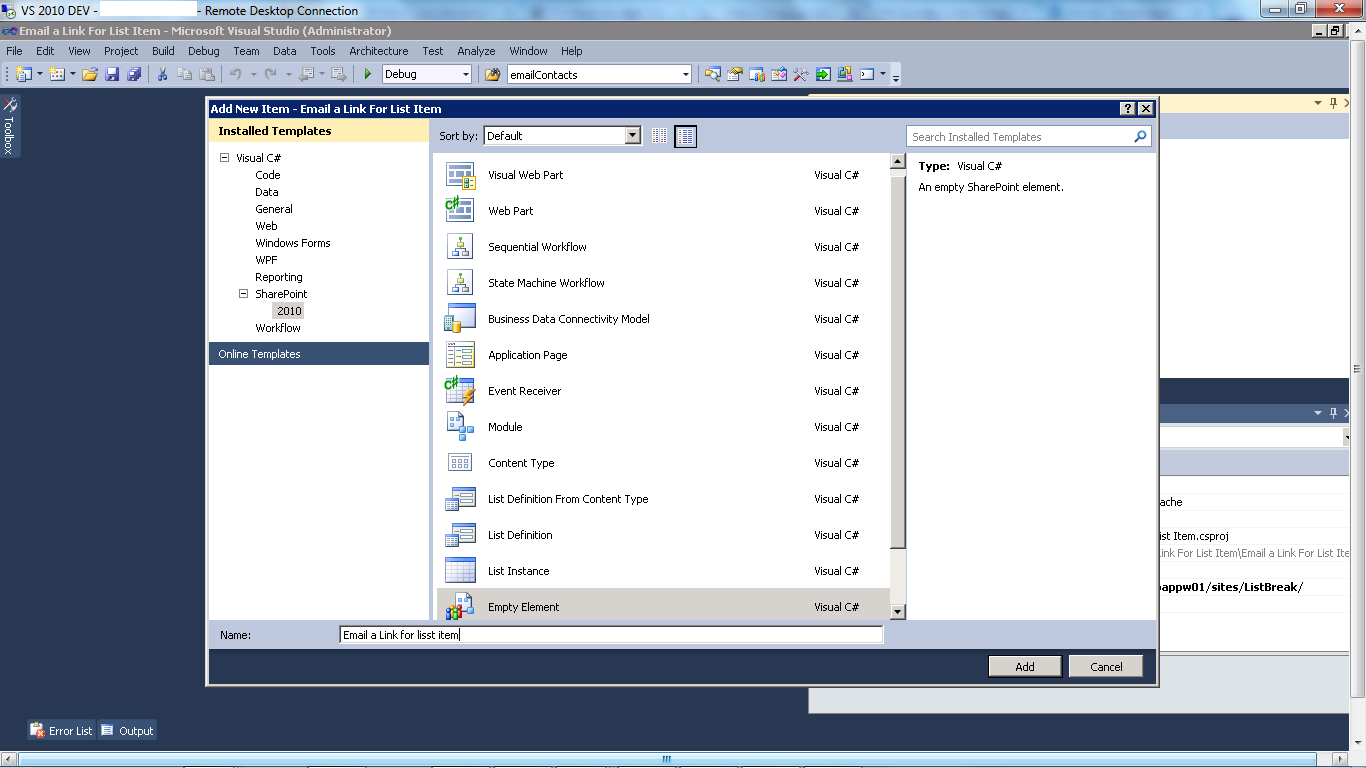
Click on the Finish button and you should have a SharePoint project created. Please use the name of the project as per your requirement. Now once added, right click on the project and select add new item. In the below screen that is seen, select empty element. Name it appropriately, this is more of an .xml file that is going to do the trick for us.

VS Step 3 add empty element

Open the empty xml file and paste the following code given below: modify a few parameters to suit your requirement.

<br />
&lt;Elements xmlns=&quot;http://schemas.microsoft.com/sharepoint/&quot;&gt;<br />
 &lt;CustomAction<br />
        Description=&quot;EFH Email A Link&quot;<br />
        Title=&quot;EFH Email A Link&quot;<br />
        Id=&quot;{DB6F9FD7-2E67-44a2-9E7D-BE071FBEF309}&quot;<br />
        Location=&quot;CommandUI.Ribbon&quot;<br />
        RegistrationId=&quot;100&quot;<br />
        RegistrationType=&quot;List&quot;<br />
        Sequence=&quot;1&quot;&lt;/strong&gt;&lt;/em&gt;<br />
        Rights=&quot;ViewListItems&quot;<br />
        xmlns=&quot;http://schemas.microsoft.com/sharepoint/&quot;&gt;<br />
    &lt;CommandUIExtensionxmlns=&quot;http://schemas.microsoft.com/sharepoint/&quot;&gt;<br />
     &lt;!-- Define the (UI) button to be used for this custom action --&gt;<br />
      &lt;CommandUIDefinitions&gt;<br />
       &lt;CommandUIDefinitionLocation=&quot;Ribbon.ListForm.Display.Manage.Controls._children&quot;&gt;<br />
         &lt;ButtonId=&quot;{B4D644C1-B0DE-4856-9F6A-380B47C05D15}&quot;<br />
          Command=&quot;{AAA6F08B-F53E-4799-BA2F-8D89F0E7AC01}&quot;<br />
          Image16by16=&quot;/_layouts/1033/images/formatmap16x16.png&quot;<br />
          Image16by16Top=&quot;-16&quot;<br />
          Image16by16Left=&quot;-88&quot;<br />
          Sequence=&quot;1&quot;<br />
          LabelText=&quot;EFH Email A Link&quot;<br />
          Description=&quot;EFH Email A Link&quot;<br />
  TemplateAlias=&quot;o2&quot; /&gt;<br />
       &lt;/CommandUIDefinition&gt;<br />
     &lt;/CommandUIDefinitions&gt;<br />
    &lt;CommandUIHandlers&gt;<br />
       &lt;!-- Define the action expected on the button click --&gt;<br />
       &lt;CommandUIHandlerCommand=&quot;{AAA6F08B-F53E-4799-BA2F-8D89F0E7AC01}&quot;<br />
        CommandAction=&quot;javascript:CustomEmailaLink('{ItemId}','{SiteUrl}','{ItemUrl}');<br />
                       function &lt;strong&gt;&lt;em&gt;CustomEmailaLink&lt;/em&gt;&lt;/strong&gt;(ItemId,SiteUrl,ItemUrl)<br />
                       var linkValue = encodeURIComponent(window.location.href);<br />
                       var items = SP.ListOperation.Selection.getSelectedItems();<br />
                       window.open('mailto:?subject=This Item Needs your attention'+'&amp;amp;body='+ linkValue);<br />
             }&quot;/&gt;<br />
     &lt;/CommandUIHandlers&gt;<br />
   &lt;/CommandUIExtension&gt;<br />
 &lt;/CustomAction&gt;<br />
&lt;/Elements&gt;<br />

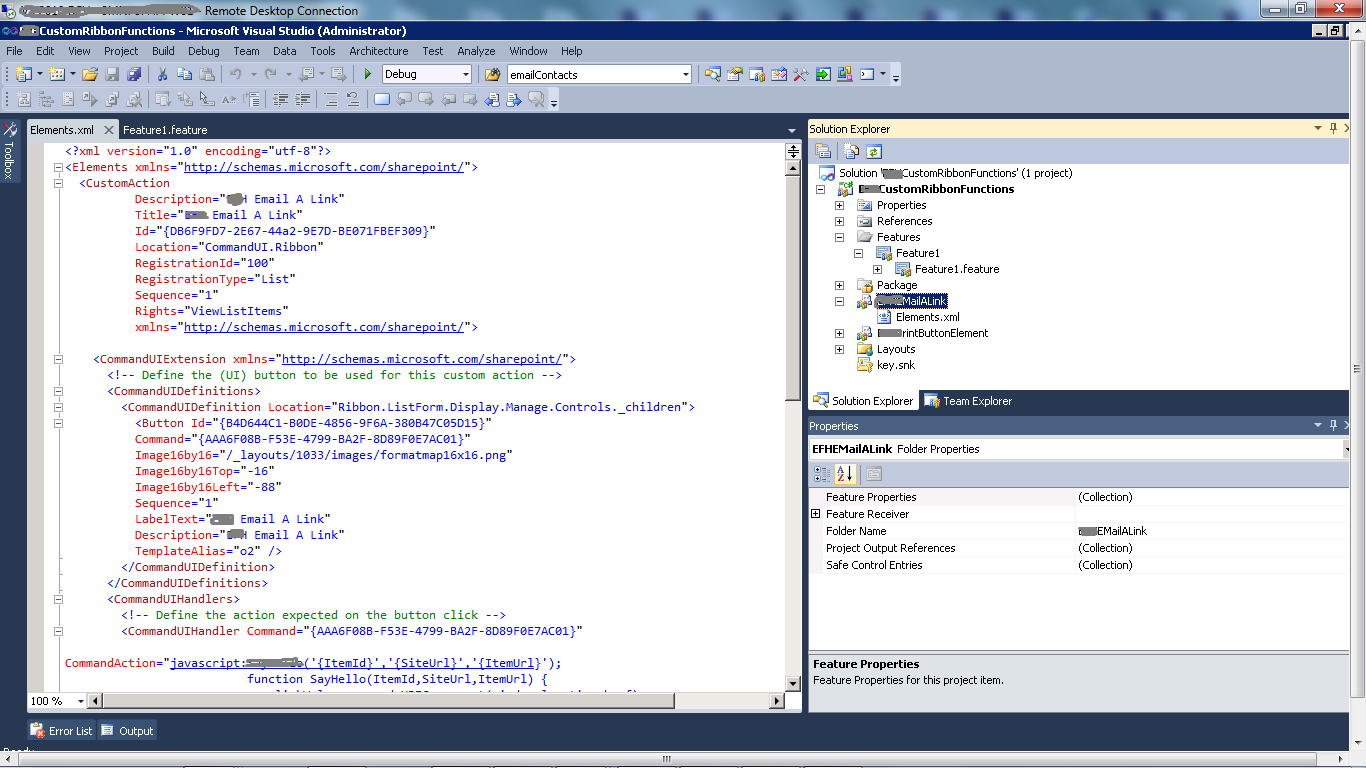
You screen should look like this

Vs Studio Email a link Code Editor

Visual Studio Email a Link Code Editor


Now for a little explanation :

The main tag would be the  <CustomAction which would have

Description=”EFH Email A Link” == Refering to what your ribbon control is all about

Title=”EFH Email A Link” == the title of the ribbon control

Id=”{DB6F9FD7-2E67-44a2-9309}” == unique guid, generated byGUID tool in VS

RegistrationType=”List” == for what type of component would this be used.we specify this explicitely as list

<CommandUIDefinitionLocation=

“Ribbon.ListForm.Display.Manage.Controls._children”>


this is the control inherited from which this ribbon button already exists ( remember i said we need to exploit the existing button from the library email a link functionality.

Image16by16=”/_layouts/1033/images/formatmap16x16.png”

Let this remain as it is as we are using the existing image. in case you want a different image, please create a 16 X 16 pixel sized image and put it into the layouts / 1033 / images location      

Image16by16Top=”-16″ = = this attribute would not be valid if you are using a custom image

Image16by16Left=”-88″ = = this attribute would not be valid if you are using a custom image

LabelText=”EFH Email A Link” == the text that would be displayed

this is the main section where we have given our own custom JavaScript function.         

CommandAction=”javascript:CustomEmailaLink(‘{ItemId}’,'{SiteUrl}’,'{ItemUrl}’);

function CustomEmailaLink(ItemId,SiteUrl,ItemUrl) {

var linkValue = encodeURIComponent(window.location.href);

var items = SP.ListOperation.Selection.getSelectedItems();

window.open(‘mailto:?subject=This Item Needs your attention’+’&amp;body=’+ linkValue); 

What this function does is that it takes in three input parameters like the ID of the individual list item, the url of the site and the url of the individual item and sends it as parameters to the mailto inbuilt function java script function.

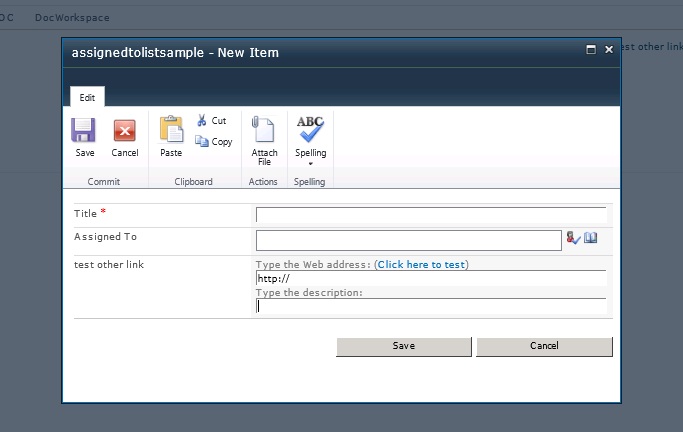
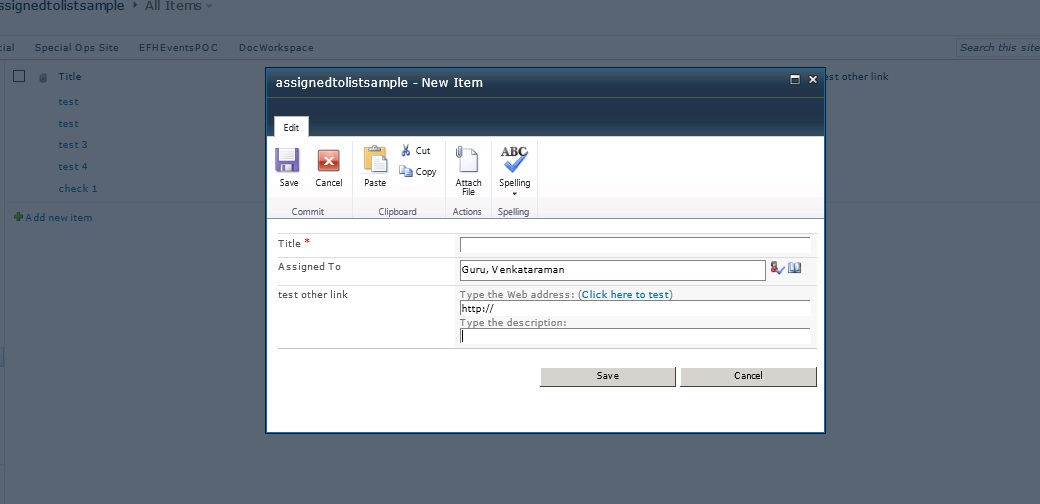
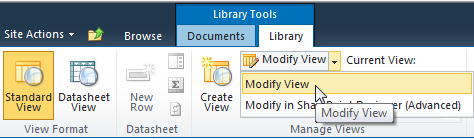
Now finally : Run the build, and deploy the solution. Activate the feature and  you should be able to see the ribbon control for the library where this function was meant to be as shown below.

Email a Link

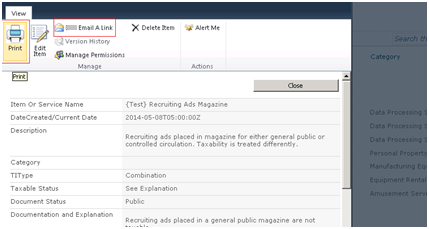
“Email a Link ribbon button

This ribbon button invokes the default email client and pre-loads the current item link to the body of the email. If a default email client is not available, then it prompts the user to configure a default email client.

Happy Coding 🙂 !!!!!!!!!

Guru

SharePoint Prompts for Credentials Three Times Followed by a Blank White Page

Several of my users have encountered the problem of three failed login attempts to SharePoint resulting in a blank white screen.  This can happen when a user’s  login credentials (username and password) are incorrect.  Unfortunately, this can also happen when they put in their correct information.  This second scenario can be bedeviling so I’ll go over the various tasks you can perform to resolve this problem:

1.  Clear your browser cache and restart your browser
2.  Clear your cache in Credential Manager
3.  Alternate way to clear your cached credentials
4.  Add site to Trusted Sites
5.  Pass along current credentials to IE

**Please also note the addendum regarding prompts for a mapped drive to a SharePoint site.


1.  Clear Your Browser Cache and Restart Your Browser

Perhaps the easiest and most well known, you’ve probably already tried this step.  If you have not, Google the steps and perform them, then restart IE.

2.  Clear Your Cache in Credential Manager

  1. Close any open browser windows
  2. Open Control Panel.
  3. On the upper right side of Control Panel, change the View by: dropdown selection from Category (shown below) to either Large Icons or Small Icons.  Pick either one.
    Category-Control Panel
  4. In Control Panel, open Credential Manager.
    Credential_Manager
  5. In Credential Manager, select the URL that is not authenticating properly.  It will expand the entry.
  6.  Select Remove from vault
    remove-from-vault
  7.  Select Yes to the warning message that follows
  8. Close Credential Manager
  9. Open your browser and try to connect again

Alternatively, if you have WinXP you will not have Credential Manager – you will have Stored Usernames and Passwords instead.  This site will guide you on how to clear this system cache in WinXP.


3. Alternate Way to Clear Your Cached Credentials

  1. Close any open browser windows
  2. On the Run line, type (or copy and paste) the following:
    rundll32.exe keymgr.dll, KRShowKeyMgr

    Stored-user-names-and-passwords

  3. Click OK
  4. Select the credential you need to clear and then click the Remove button
  5. Click the Close button
  6. Open your browser and try to connect again

Source: Windows IT Pro website


4.  Add Site to Security Zone

Internet Explorer lets you categorize websites into different zones with different security policies for each zone. Be default, sites are all categorized as Internet.   We will look at two different types of site: Intranet and Trusted Site.

Intranet sites

If you are on a company Intranet site you should add the url to your list of sites in your Intranet zone.

  1. In Internet Explorer, open Internet Options
  2. Select the Security tab
  3. Select the Local Intranet icon
  4. Click the Sites button
    Local Intranet
  5. If the site does not use the https protocol, then un-check the checkbox for:
    Require server verification (https:) for all sites in this zone.
    require-server-verification
  6. Paste or type in the url of the site into the input box, then select the Add button
  7. Click Close
  8. Click Ok
  9. Close your browser
  10. Open your browser and try to connect again


Trusted Sites

If you are experiencing trouble authenticating to an Internet site that you regularly visit (and that you trust) you should add it to your Trusted Sites zone.


  1. In Internet Explorer, open Internet Options
  2. Select the Security tab
  3. Select the Trusted Sites icon
  4. Click the Sites button (as shown below)
    Internet Options
  5. If the site does not use the https protocol, then un-check the checkbox for:
    Require server verification (https:) for all sites in this zone.
    require-server-verification
  6. Paste or type in the url of the site into the input box, then select the Add button
  7. Click Close
  8. Click Ok
  9. Close your browser
  10. Open your browser and try to connect again


5.  Pass Along Current Credentials to IE

  1. In Internet Explorer, open Internet Options
  2. Select the Security tab
  3. Select the Custom Level button at the bottom
    Custom-level
  4. Scroll all the way to the bottom of this window
  5. In the User Authentication section, select:
    Automatic logon with current user name and password
    automatic-logon
  6. Click OK
  7. Click OK
  8. Close your browser
  9. Open your browser and try to connect again


**Addendum Regarding Mapped Drive to a SharePoint Site

You’ll want to configure Internet Explorer for automatic logon with current user name and password as above.  However, you’ll also need to edit your registry to tell Windows to allow the webclient service to remember passwords.

  1. Open Registry Editor (RegEdit)
  2. Navigate to this registry key: HKEY_LOCAL_MACHINE\SYSTEM\CurrentControlSet\Services\WebClient\Parameters
  3. Click Edit > New > Multi-String Value and enter the name:
    AuthForwardServerList
  4. For the Value enter the URL of the sharepoint site
  5. Close RegEdit
  6. In Services, restart the WebClient service.

Source:  http://tipsyouforgot.blogspot.com/2010/06/remember-password-setting-not-working.html


Redirect a SharePoint site

Recently, we needed to redirect users from a site in SharePoint to another site.  First, we set the old site to Read-Only. How? Navigate to {Central Administration Site |Application Management | Configure Quotas and Locks} and select one of the options under “Site Lock Information“.

We then copied all of the content, and sent out a message to the users affected about the new site location.  For those who did not get the e-mail, we wanted to redirect traffic to the new site along with an explanatory message.  We went with “the simple way” below but if you feel like showing off, go with the second option.

1. The Simple Way

This tutorial by Devin Walker fits the bill.  It uses the JavaScript Alert box which provides for a message and an OK button.  We chose to use a Confirm box instead in order to allow a choice for users to either stay on the Read-Only site or go to the new site.

Here is the code we used:

<script type=”text/javascript”>// <![CDATA[
 var cnf=confirm("XYZ site has been migrated, and this site is now Read-only. \n\nClick Ok to navigate to the new, migrated site or Cancel to remain on this Read-only site.");
 if(cnf)
 {
 location.href="http://sharepointserver/sites/XYZ/";
 }
 // ]]></script>

To Implement
Use a Content Editor Web Part (CEWP) and paste in the above code, modified with your message and your new site url in the location.href statement.  That’s it.

2. A Better Way

The above provides a simple, old school (some would say “archaic”) redirect script and message.  If you’re like me, sometimes you like to be fancy and modern.  In this case, implement this nifty script instead to alert users and redirect them to the appropriate sites.

To Implement
Download the zip file from the website, unzip the files, and upload them to your Site Assets document library (or a folder there created for this purpose).

Then, install a Content Editor Web Part (CEWP) on the target page and proceed as above, edited for your environment and the path to your Site Assets document library.

Adjust / Modify a Column Width in a List

Today I implemented an Issue Tracking list in SharePoint 2010 for a project.  As the users started using it, I noticed that the Title column was narrow, hence the longer titles were wrapping to several lines.  This does not look good at all.

So I went to Google and set out to modify the column width of my list.  I found this post by someone named Aanu but was disappointed that it didn’t work.  As is often the case, I read further down into the comments and found a gem from a user named George: we needed to add one more parameter to the style information.  Now it works just fine.  Here is the process in one neat, concise explanation.

Open the site in SharePoint Designer 2010, then navigate to Lists and Libraries, then select the desired list.  In my case it was Issues.

SharePoint-Designer-2010-Lists-and-Libraries

Select the List, then select the desired view.  In my case it is “All Issues”.  Views are located in the upper right.

Now select the column you want to edit.  Follow Aanu’s post about editing both the <th> and <td> sections by performing these three actions:

  1. Delete nowrap=”nowrap”
  2. Change the width to your desired width.
  3. Add parameters in the “style” code for overflow and white-space.

Now, follow George’s suggestion to perform a fourth action:

4.  Add a parameter for min-width in the style code as well.


Your code should look like the below images.

**Click to open them full-size.**

Modify-list-column-width-in-SharePoint-2010

TH code


Modify-list-column-width-in-SharePoint-2010-td

TD code

Unable to Create a New Document Library or List on a site

Today a site owner wanted to create a document library on his site that had been migrated from MOSS 2007 to SharePoint 2010.  He attempted to create the doc library several ways, none of which worked:

  • Site Actions, New Document Library
  • Site Actions, More Actions
  • Libaries, Create

The problem turned out to be a Site Feature that was not activated.  To resolve this issue, I went into Site Actions, Site Settings.  Under Site Actions, select Manage site features.

Manage-site-features

Scroll down to Team Collaboration Lists and activate this feature.


Team-Collaboration-Lists


You should now be able to add Lists and Document Libraries to your site.


Display Name will not Update

I had a user who got married and submitted her name change to the company.  Active Directory was properly updated.  Her old last name (Smith) does not appear anywhere in her AD record and has been replaced with her new last name (Jones).   We have SharePoint 2010 set to perform an AD sync every night.  For some reason, in SharePoint her name continues to show the old last name (Smith).

Attempt to Resolve
We used PowerShell to determine where all she had privileges and it was in only two groups: Member of one group, Visitor in another. So we removed her account in SharePoint via PowerShell.  Then, when I went to manually add her back to the two groups, I used the PeoplePicker to find her.  She was there correctly (Jones).  So I selected her, then Add, only to find her display name incorrectly rendering as Smith.   Since AD is correct it has to be SharePoint caching this somewhere, I reasoned.

Solution
To make this quick, the user at this forum thread had the exact same problem.  After much back and forth, this is the correct solution submitted by one Mayur Joshi:

Let’s do this, hit the below URL 

http://{SiteCollectionURL}/_layouts/people.aspx?MembershipGroupId=0

Look for the user that has old name, select the checkbox, click on Actions -> Delete User From Site Collection. 

Make sure to note the parameter of MembershipGroudId=0.  (That’s a “zero”, by the way.)

Happily, this solution resolved the issue for us.  Thank you Mayur… and Google.

Two Types of SharePoint Developers

There seems to be a fair amount of confusion in the IT world regarding SharePoint Development.  Essentially, the term SharePoint Developer is too vague.

I have conversations with recruiters on a frequent basis who want to discuss the three typical roles of SharePoint Architect, SharePoint Administrator, and SharePoint Developer.  We need to discuss this third role here, that of the SharePoint Developer, because it’s really not so well-defined.

To state it succinctly, there are at least two types of SharePoint Developers.  I use the terms light and heavy.

Role Areas of Skillset
Light Developer HTML, JavaScript, CSS, site branding, InfoPath, SharePoint Designer, Workflows, PowerShell
Heavy Developer Visual Studio, C#, .NET, SQL, custom web parts


It would be helpful if the IT / Staffing / Consulting industries would adopt these distinctions. This would allow for a better understanding of project / business needs as well as the right fit for the resources required to fit those needs.  We need clarity on what we mean when a project calls for a SharePoint developer.

At the very least, this approach allows for defining more precisely what type of resource is needed (very helpful to recruiters) as well as the different hourly rates (very helpful to project managers).

Uploaded files to Document Library show as Checked Out

If you have a document library with required fields, then uploading multiple files at once is going to cause them all to be “checked out” to the person who uploaded them.

As you know, if you upload a single file to a document library with required fields you will be prompted to fill out those fields in a form.  However, if you upload multiple files at once SharePoint will take them all quietly but with a serious catch: it puts them in a “checked out” state.  With no warnings or messages, I have found this to be quite confusing to users.    

My simple solution is to edit the default list view to display the field “Checked Out To”.  Then users will easily see the files checked out to them and hopefully act to correct it.

First, modify the View.

Modify-view


Then add the column for “Checked Out To” as below.

Checked-out-to
Click OK and you’re all set.


There are several other options:

  • Train users to upload files one at a time and provide required information when prompted
  • Set a default value for each required field in the Libary Settings, Columns
  • Turn off required fields
  • Use a batch check-in software product

Page 3 of 5

Powered by WordPress & Theme by Anders Norén