Nov 14
4
Sometimes we are tasked with weird requirements and we go halfway around the world to get them done. Remember one thing: there is quite often a simple shortcut available. I have realized that JavaScript and JQuery are so powerful that they can make these shortcuts achievable for us in an amazingly small amount of time.
Our requirements were simple. They wanted a SharePoint list that has numerous checkboxes on the new item form and they wanted all the boxes to be selected on form load by default. The clients would then de-select a few based on what they wanted.
SharePoint allows only one check box to be selected by default on form load. To achieve our goal, I wrote one single line of code that did the trick… eager to know how? What are we waiting for… Lets dive!!!!
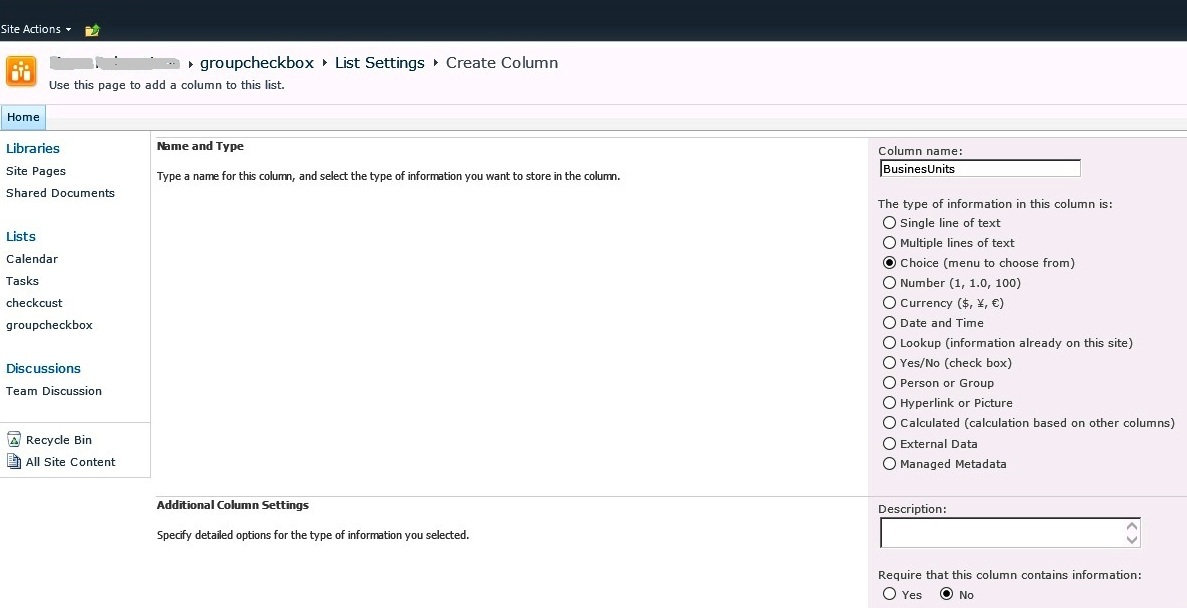
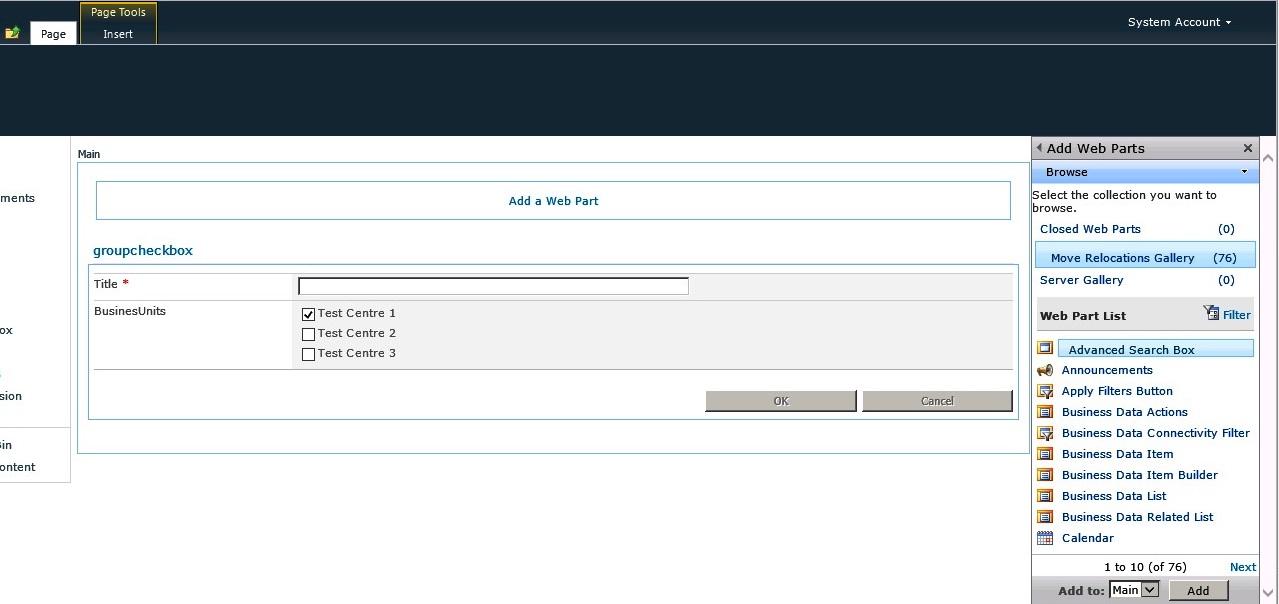
Step 1: Go to your list and add a choice control, as shown below
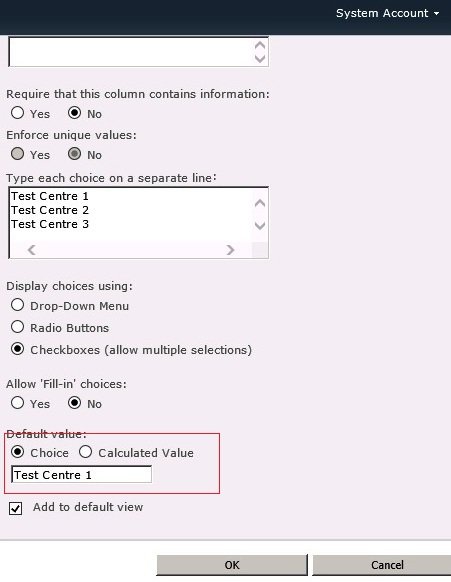
Step 2: Provide options as shown below and observe that only one option can be selected as default. SharePoint does not allow you or give you the power to select multiple options by default on load in the choice menu although it still give you multi-select option manually.
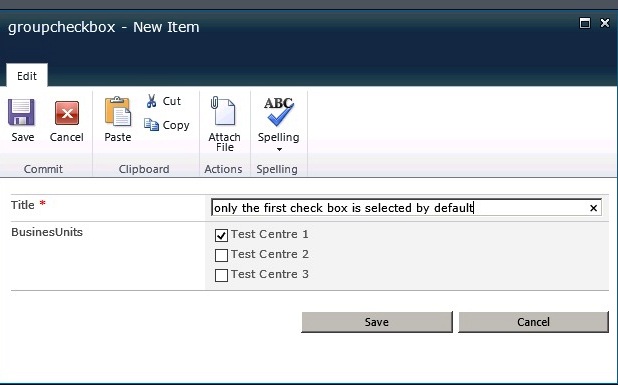
Step 3: Go back to the list and click on the new item and you would see the newform.aspx opened with only the first option that you selected to be checked by default on form load.
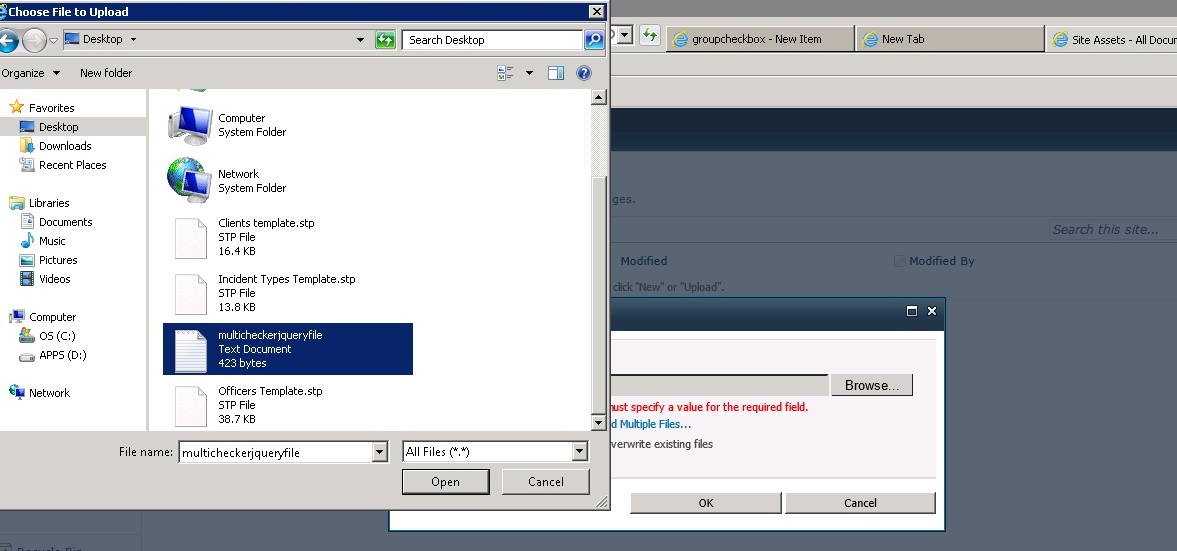
step 4: Open notepad and put the following code into it and save this file with whatever name you want to on your desktop. Remember it should be a text file. In my case I named it multicheckerjqueryfile.txt for an example’s sake as shown below
<script src="http://ServerName/sites/SiteName/SiteAssets/jquery-1.10.2.min.js"></script>
<script src="http://ServerName/sites/SiteName/SiteAssets/jquery.SPServices-0.7.2.min.js"></script>
<script src="http://ServerName/sites/SiteName/SiteAssets/jquery.SPServices-0.7.2.js"></script>
<script type="text/javascript">
$(document).ready(function() {
//Get the current user
$("INPUT[type='checkbox']").attr('checked',true);
});
</script>
Logically what we are doing is getting the choice control through its html disguise and setting it “checked” property attribute to TRUE.
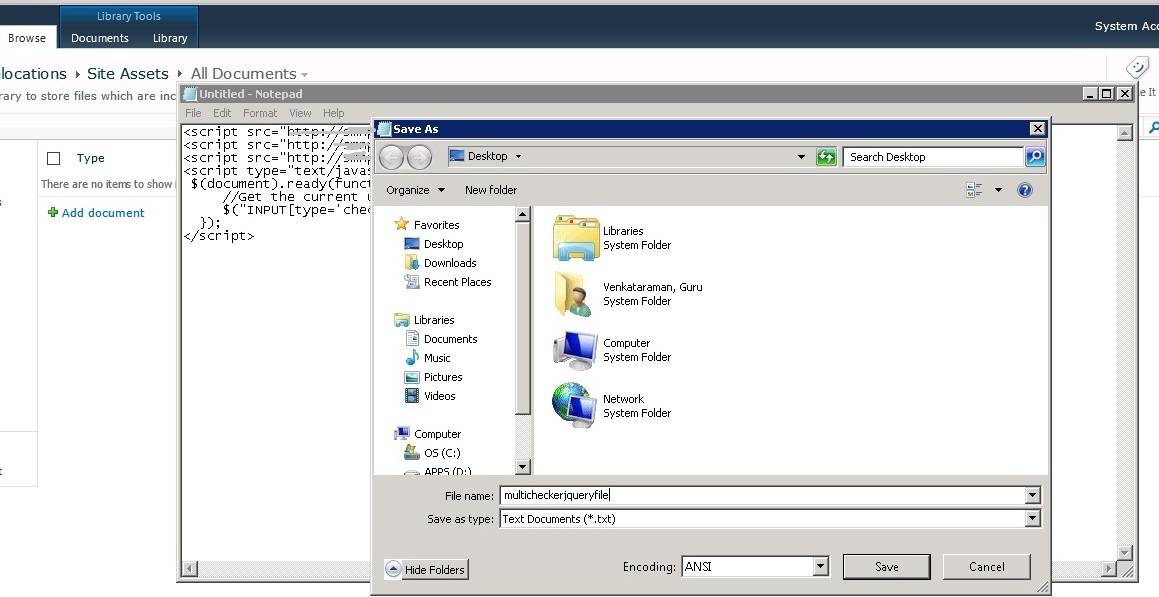
step 5: Now upload this file to your site assets library as shown below along with the three other supportive jquery library files. You can also download the latest version of these files from the internet. For the rest of you who want it quickly, please pick it from our site. P.S: these are not the latest but ones sufficient enough to get you through this task.
I have added these files that I used during my development. You can also download the latest files from the following site (http://jquery.com/download/)

Step 6: Once all the upload is done, type the url of the list and append the newform.aspx with it with some additional parameters. Once done, you should see the new form.aspx page, in editable state as shown below.
So your url should be like
http://servername:port number/Lists/list name/newform.aspx?PageView=Shared&ToolPaneView=2
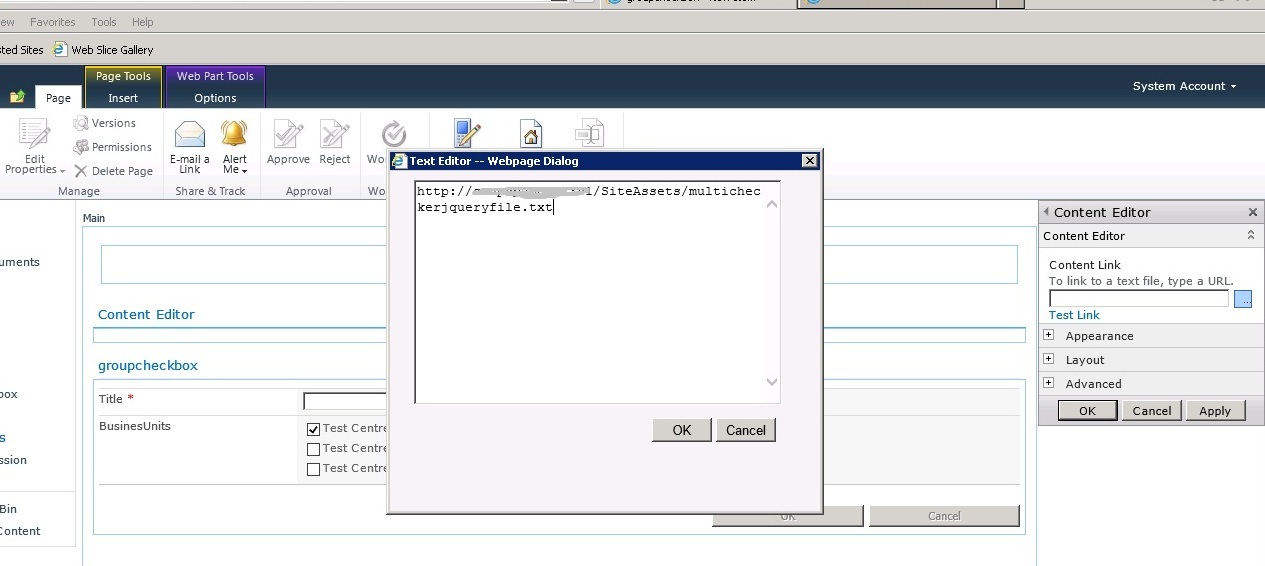
Step 7: Click on the “Add a Webpart” link and add a content editor web part. In the “Content Link” field, provide the location where you uploaded the text file that contains the logic. in my case it was
http://servername/siteassets/multicheckerjquery.txt as shown below
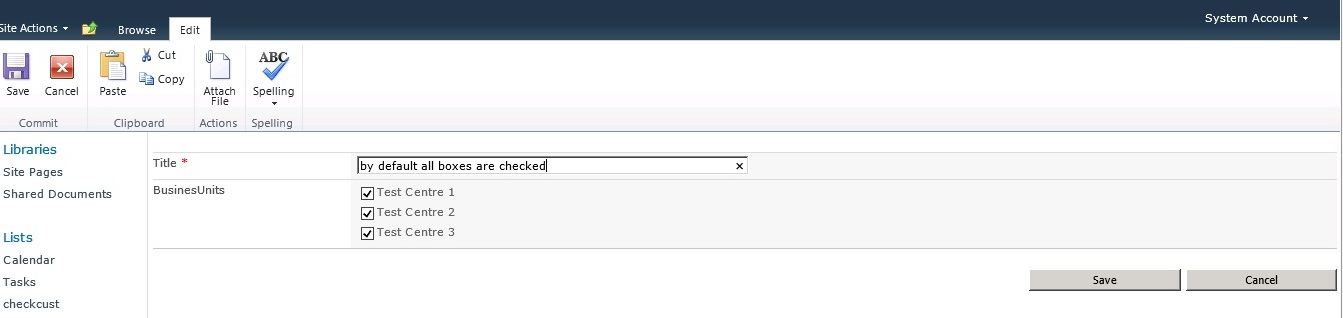
Step 8: Click on the Apply button and then the OK button. Now refresh the page and you will see all the check boxes checked by default when the page is opened as shown below.
Happy Coding
Guru !!!
 Copyright secured by Digiprove © 2014-2015 Douglas Spicer