May 16
8
Now that you’ve created a brilliant chart, graph or dashboard in Tableau you want to render it on a SharePoint site. Here are the steps to do this. Honestly, the step you’re probably not thinking about is Step 1 below. If you’re working with the Tableau client on your desktop, you can make awesome interactive graphs but for everyone to see it, it needs to be published correctly to the Tableau server and make sure that the permissions are properly set.
Step 1: Publish your work to a Tableau publishing server.
Step 2: Open your browser and navigate to the Tableau server, find your work, and select it.
Step 3: Now click the Share link in the top right of your work, as highlighted below.
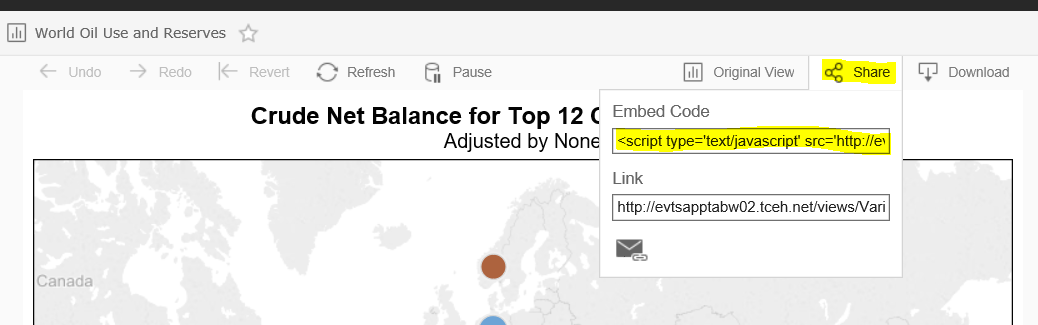
Step 4: A dropdown will reveal an Embed Code script and a Link. Highlight and copy the Embed Code script.
Step 5: Now open Notepad and paste in this code. Save it and give it a name. Make sure to keep the .txt extension and avoid using spaces. Use hyphens or underscores instead.
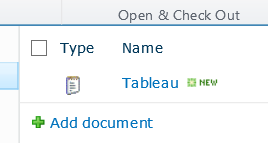
Step 6: Upload this text file to the SharePoint site where you want to render this graphic. I named my Tableau in the below screenshot.
Step 7: Select the file and open it in your browser. It should actually render and should look great.
Step 8: Now Select and Copy the entire url from the browser.
Step 9: Navigate to the page where you want the graphic to render.
Step 10: Add a Content Editor Web Part where you want the graphic to appear and paste in the url for the Content Link section.
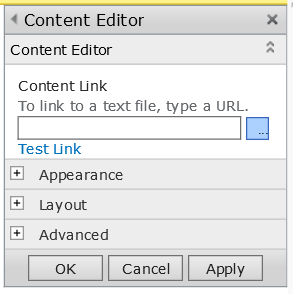
Step 11: Click OK on the Content Editor Web Part.
Step 12: Save and Close the page.
Success!
 Copyright secured by Digiprove © 2016 Douglas Spicer